Before Deploying
Transporting the Boat
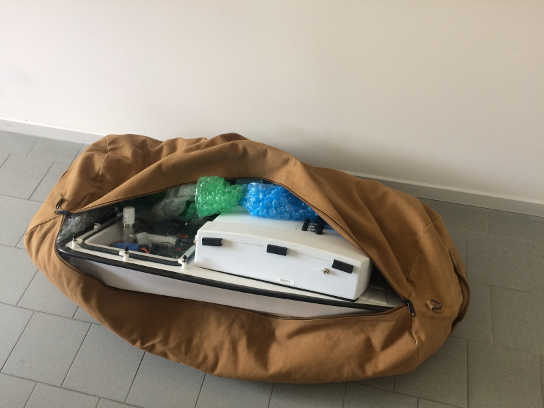
The boat has been conceived to be deployed by a single person. It is possible to transport the boat putting it inside a duffle bag.
Before storing the boat inside the bag, it is suggested to:
- Taking out the battery
- Making sure lids are secure
- Putting bubble wrap inside the bag
- Ensuring that the bag is long and large enough to store the boat comfortably
Personal transport
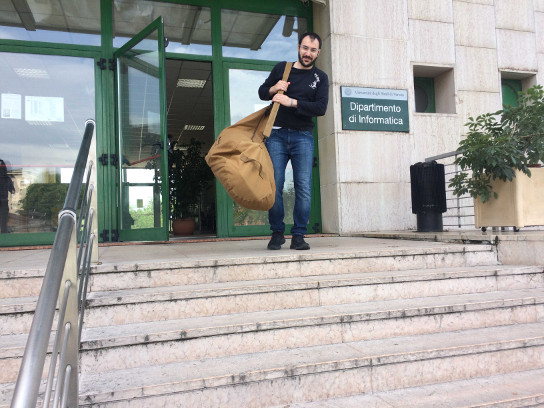
The boat can be transported by a single person using a duffle bag. It is suggested to ensure that the bubble wrap is placed between the edges of the boat and the legs of the person carrying the boat.
Vehicle transport
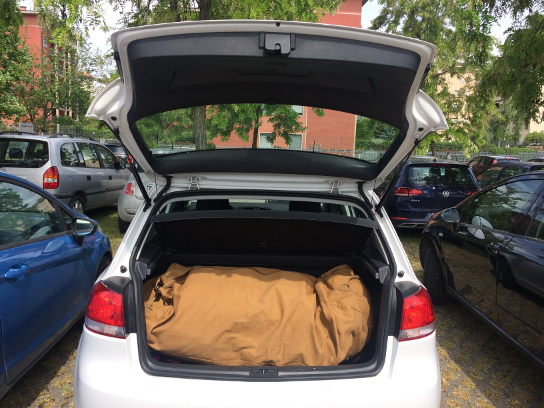
To reach a deployment location that is reachable by car, it is possible to transport the boat using the rear luggage compartment of the car. Any typical passenger car can be used, a track or utility vehicle is not required.
Before putting the dufflebag containing the boat inside the rear luggage compartment of the car, it is suggested to:
- Removing sharp or fragile objects from the rear luggage compartment
- Ensuring that the rear luggage compartment is long and large enough to store the duffle bag comfortably

Long distance transport
To reach a deployment location that is not reachable by car, it is suggested to send the boat at destination by using a professional packaging company.
Charge the LiPo batteries
The boat’s LiPo batteries are quite large.
It is a good idea to never use more than 3 amps of charging current. This should prolong the lifetime of a battery.
Other than their unusually large capacity, the LiPo batteries are typical. Follow your typical balance-charger instructions. Take a look at LiPo battery safety.
video also available at http://intcatch.eu/manual/_static/videos/charge_battery.mp4
Charge the phone and tablet
These are standard, modern Android devices. Plug them into a USB device charger.
The phone will be charged by the boat’s battery during operation.
The tablet will use a lot of battery power to display the app with the brightness required to deploy during a sunny day. If you plan on deploying for several hours, it would be a good idea to bring a portable power bank to help charge the tablet while in the field.
Cache (preload) maps for the tablet
The tablet app’s map is not one single, large image - instead, it is stitched together from many smaller images, called “tiles”.
There is not just one sheet of tiles. If you increase or decrease the zoom level, new images must be used.
All together, these sheets of tiles form what you could call a “pyramid” of tiles, or a map that lets you zoom and pan smoothly.
Each time you change the zoom level or pan to a new location, the displayed tiles change to match. These tiles must be downloaded from a server that supplies them. Thankfully, the app downloads them automatically when you zoom or pan. It retains them, or “caches” them, so that you can view them later without downloading them again.
However, if you do not have an internet connection, the app cannot download them. If the tablet app does not have the tiles and cannot download them, it will display a generic blank replacement.
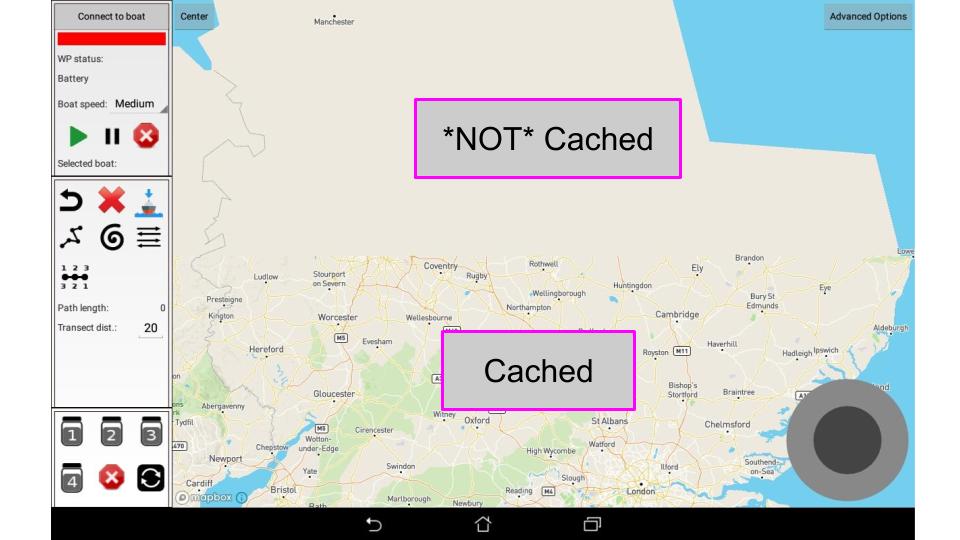
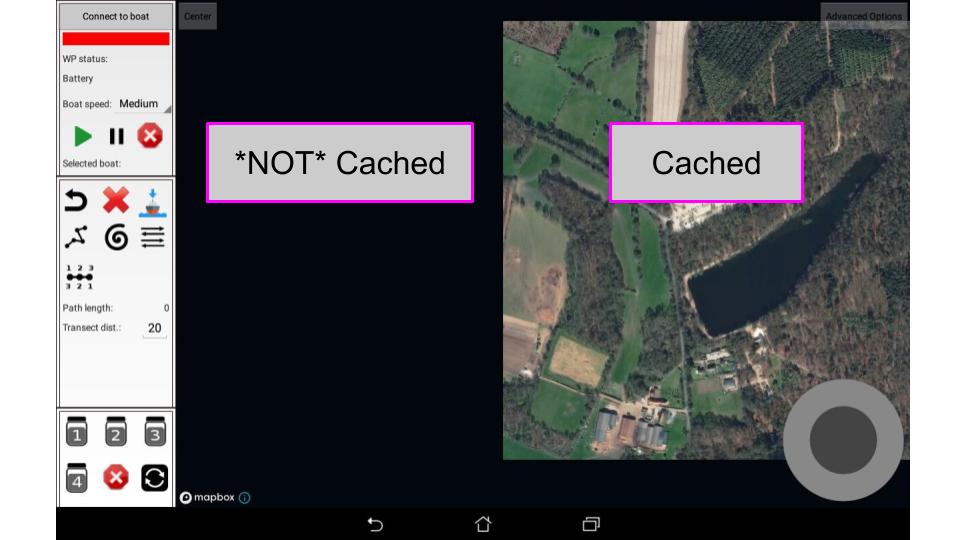
Because of this, a user should cache the tiles that they need for a deployment with a convenient internet connection before the actual deployment of the boat. It is much easier to connect to the office WiFi than be forced to create a WiFi hotspot in the field!
After connecting the tablet to an internet connection, navigate the map to the location that you need to cache tiles for.
Every tile that the map displays for you is cached. Pan around, zoom in and out, and change between vector and satellite maps to download all the tiles you need for the deployment.
Note that clearing the app’s data or uninstalling it will delete these stored tiles. You will need to download them again.
Fill up cooling loop resevoir
The cooling loop resevoir should be at least half-full when you deploy the boat.
If it is not, unscrew the lid and carefully pour in a small amount of clean water or diluted coolant.
After you finish, make sure to replace the resevoirs lid.
Sensor calibration
[brief description, provide links to GoSys information]
Connecting a computer to the phone or tablet
After plugging the phone or tablet into your computer with a USB connection, various versions of the Android operating system will require an additional step to allow the connection.
On Android 7+ phones (typical for the INTCATCH boat), a prompt will appear in the pulldown menu stating that the default connection is power only. Touch that prompt and select file transfer.
Older versions of Android may just open a yes/no prompt. You will need to select yes to allow the computer to connect.
Once you do, your computer should recognize the device as a harddrive. You should then be able to move files back and forth.
Installing the phone application
If the phone already has a version installed, uninstall it first.
Then, download the .apk file onto the phone. This can be done via a USB connection or an internet connection.
Use the file manager to navigate to the .apk file. Select the file and a prompt should appear asking if you want to install it. Select yes and the app should install.
Installing the tablet application
If the tablet already has a version installed, uninstall it first.
Then, download the .apk file onto the tablet. This can be done via a USB connection or an internet connection.
Use the file manager to navigate to the .apk file. Select the file and a prompt should appear asking if you want to install it. Select yes and the app should install.
The first time you launch the tablet application, you must have an internet connection, or the app will crash. See here for more detail.
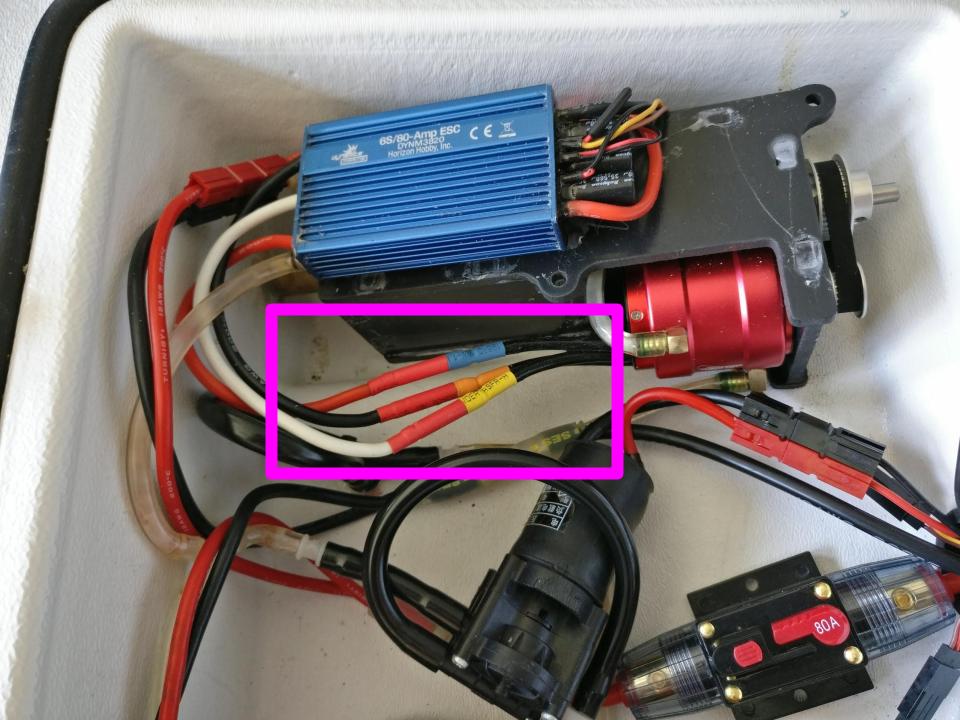
Reverse a motor’s phase
If a motor is receiving the correct control signals, but is spinning in the wrong direction, you can fix that by switching any two of the three wire connections.
You can do this while the boat is powered on, as long as you are not revving the motors.
For example, if the starting configuration is
- Wire 1 <–> Blue
- Wire 2 <–> Yellow
- Wire 3 <–> Orange
switch two wires so that the new configuration is
- Wire 1 <–> Yellow
- Wire 2 <–> Blue
- Wire 3 <–> Orange
Manually preparing and uploading waypoints
Sets of waypoints can be saved and loaded in the tablet control application.
Additional waypoint files can be manually created and uploaded to the tablet.
The files are stored in the “waypoints” folder of the tablet.
The files use a JSON format:
{
    "path0": [
        "45.50505554148813, 10.7308466295068",
        "45.50495767519297, 10.730831399844874",
        "45.50501350713182, 10.730947379545796"
    ]
    "path1": [
        "45.50485333162169, 10.730676363167845",
        "45.50482331704393, 10.730926838738128"
    ]
}
Note the use of square brackets and quotation marks.
Changing the default autonomous behaviors
The default autonomous behaviors can be altered to change the default autonomous behaviors.
Follow the required JSON format and overwrite the contents of the file stored in the “platypus_behaviors” folder in the phone.